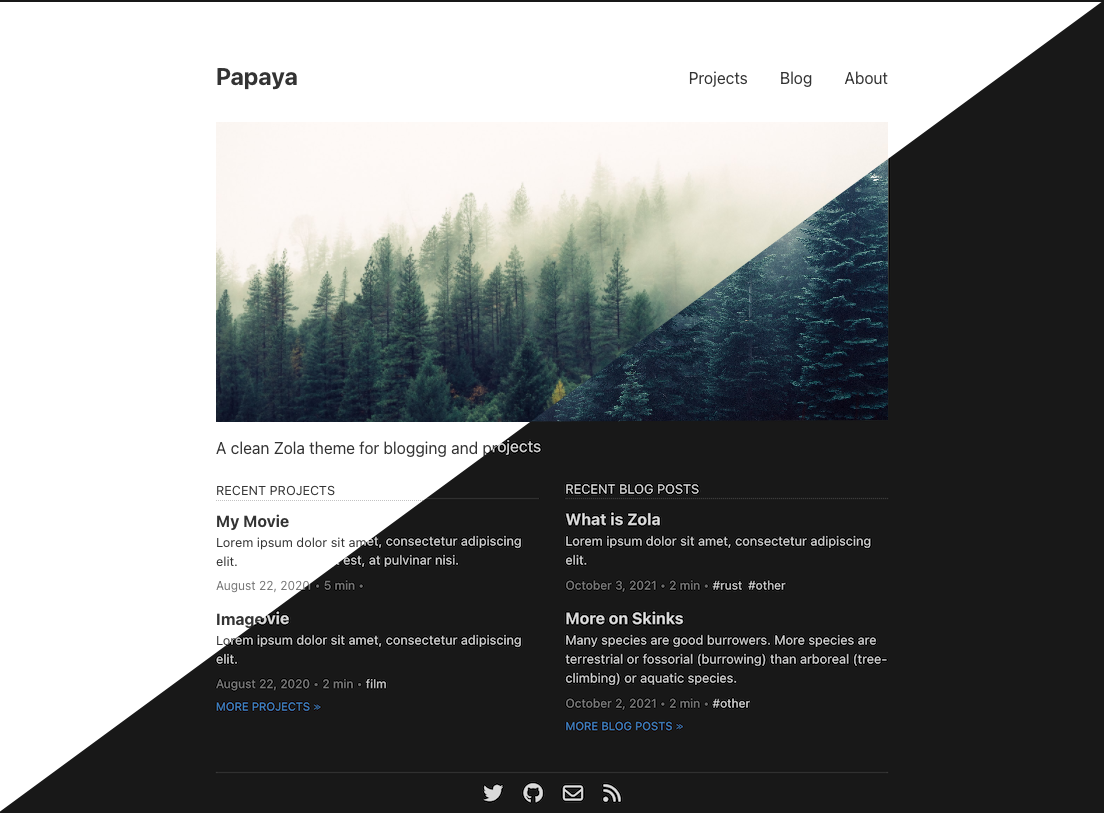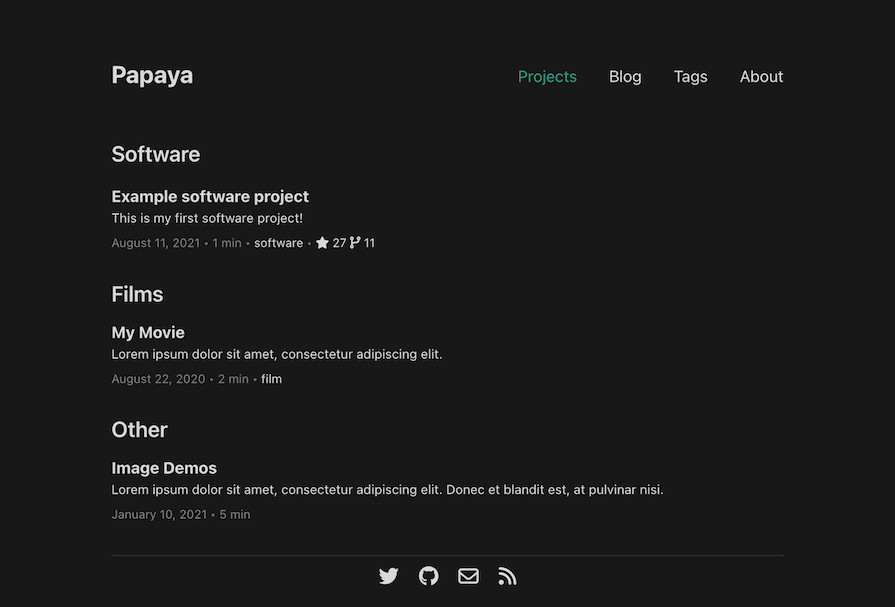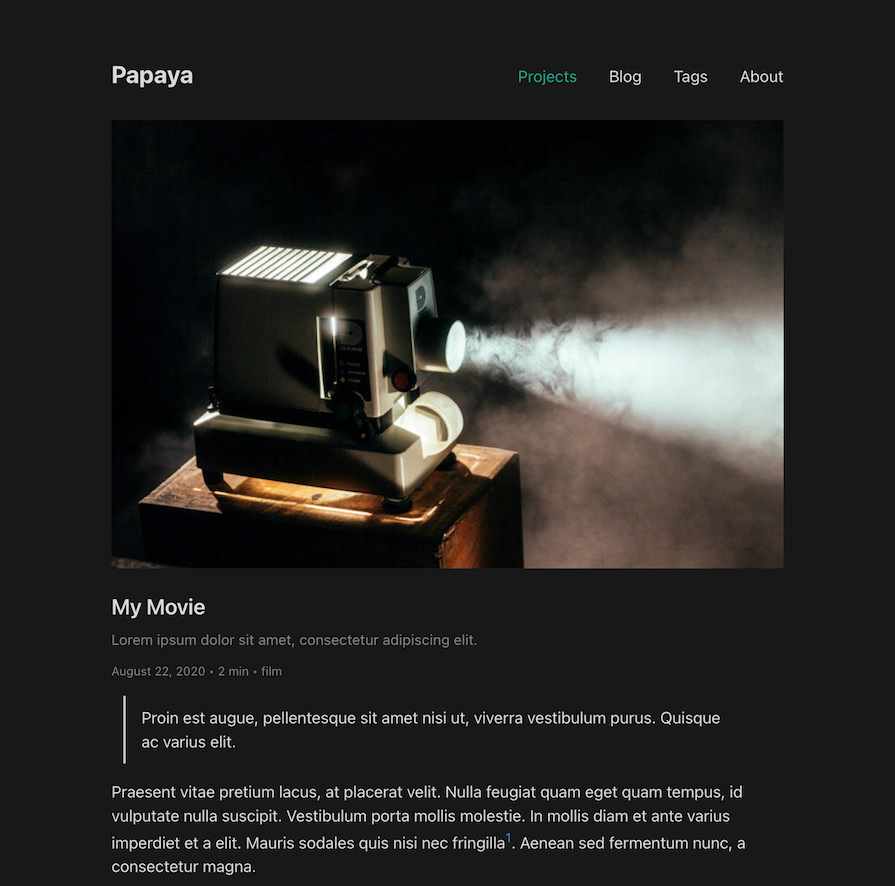
Papaya
A clean Zola theme for blogging and projects, forked from Anpu.
Preview
Demo site: https://justintennant.me/papaya/


Features
- Blog posts
- Project pages
- Automatic light/dark mode
- Categories and tags
- Optional multilingual support
- Customizable sections and navigation menu links
- Featured images for posts/pages
- Smart image embedding shortcode (
{{ img() }}) - GitHub repository star/fork counts
- Open Graph Protocol tags
- Utterances support
- Social/contact links
- 100% Google Lighthouse score
Installation
-
Clone this repository to your
themesfolder:git clone https://github.com/justint/papaya.git themes/papaya -
Set your theme setting in
config.tomltopapaya:theme = "papaya" -
Copy the following sections and keys (and their contents/values) from papaya's
config.tomland paste them into your site'sconfig.toml:[languages][languages.en][languages.en.translations]
[extra.cdn]font_awesome
-
In your
contentdirectory, add newblogandprojectsdirectories. Copy the_index.mdfile from Papaya'scontent/bloginto yourcontent/blog, and the_index.mdandcategories.jsonfiles from Papaya'scontent/projectsinto yourcontent/projects.Your
contentdirectory structure should look like this:content ├── blog │ └── _index.md └── projects └── _index.md └── categories.json -
(optional) To enable GitHub repository stars/fork counts (disabled by default to avoid hitting API rate limits), set the
$ZOLA_ENVenvironment variable toprodprior to yourzola serve/zola buildexecution.For csh/tsch:
setenv ZOLA_ENV prodFor bash/ksh/zsh:
export ZOLA_ENV=prod
Customization
Here are the customizable features of Papaya:
- Project categories
- Light/dark mode
- Multilingual support
- Sections and navigation menu links
- Post/project date formats
- Post/project featured images
- Open Graph Protocol locale/profile information
- Utterances
- Social/contact links
Project categories
In your content/projects/categories.json, you can specify the categories of projects. The formatting of the file is:
{
   "title": "keyword"
}
"title": the title text displayed for each category grouping on your projects page."keyword": the taxonomy term you'll use in your project pages.
A project can have multiple categories, and will be displayed once in each category configured.
Projects without categories will be displayed in the "Other" category listing of your project page. If you don't want the "Other" category displayed, you can copy the templates/projects.html to your own templates directory and delete/comment out the "Other" category code.
Example categories.json:
{
  "Software": "software",
  "Films": "film"
}
Example project page front matter:
title = "Example software project"
date = 2021-08-11

[taxonomies]
categories = ["software"]
The example project page above would be grouped into & displayed within the "Software" category of your projects page.
Light/dark mode
The Papaya theme can be set to "light", "dark", or "auto" mode in the config.toml.
In "auto", the light and dark modes are implicitly chosen by the prefers-color-scheme CSS media feature. The theme will switch automatically based on the viewer's OS or user agent setting.
Multilingual support
Currently Zola has basic internationalization (i18n) support, you can read more in zola's Multilingual Sites doc.
To write a multilingual site, follow the steps below (English and Chinese in this example):
-
Add a
default_languageconfiguration and[languages.zh]and[languages.en]sections to yourconfig.toml:default_language = "en" [languages] [languages.en] [languages.zh] title = "中文标题" description = "中文描述"Under the
[languages.zh]section you can override default configurations liketitle,description, etc. -
Add translations of all keywords in
[languages.zh.translations]andlanguages.en.translations]sections (see Papaya'sconfig.tomlfor a listing of all keywords):[languages] [languages.en] [languages.en.translations] projects = "Projects" blog = "Blog" about = "About" recent_projects = "Recent Projects" more_projects = "More Projects" recent_blog_posts = "Recent Blog Posts" more_blog_posts = "More blog posts" ... [languages.zh] [languages.zh.translations] projects = "项目" blog = "博文" about = "关于" recent_projects = "近期项目" more_projects = "更多项目" recent_blog_posts = "近期博文" more_blog_posts = "更多博文" ... -
Add a
_index.zh.mdfile into every section.For example: add
content/blog/_index.zh.mdandcontent/projects/_index.zh.md. -
Provide a
{page-name}.zh.md(orindex.zh.mdinto the page's directory, if it has one) for every page you'd like to translate.For example: add
content/blog/what-is-zola.zh.mdandcontent/blog/blog-with-image/index.zh.md. -
Add a
content/categories.zh.jsonfile. For example:{ "软件": "software", "电影": "film" }
Now you will have a website that supports both English and Chinese! Since default_language in config.toml is set to "en", by visiting {base_url} you will see the English version of this blog. You can visit the Chinese version by visiting {base_url}/zh.
A page (post or project) can be available in both languages or only in one language, and it's not necessary that a page is available in the default language.
Sections and navigation menu links
The navigation menu is constructed from a list of menu_items in your config.toml. For example:
[extra]

menu_items = [
   { name = "projects", url = "$LANG_BASE_URL/projects", show_recent = true, recent_items = 3, recent_trans_key = "recent_projects", more_trans_key = "more_projects" },
   { name = "blog", url = "$LANG_BASE_URL/blog", show_recent = true, recent_items = 3, recent_trans_key = "recent_blog_posts", more_trans_key = "more_blog_posts" },
   { name = "tags", url = "$LANG_BASE_URL/tags" },
   { name = "about", url = "$LANG_BASE_URL/about" },
]
A menu_item can be one of two things:
-
a link to a section. Section links can be optionally configured to display its most recently authored items on your index page. See Configuring section menu items.
-
a link to a URL. See Configuring URL menu items
Configuring section menu items
A section is created whenever a directory (or subdirectory) in the content section contains an _index.md file; see the Zola docs on sections.
Papaya has two sections by default: projects and blog. You can add additional sections or change section names. For example, you can add a section called Diary. In order to add this section, you need to:
-
Create a directory called
diaryincontent/. -
Create an
_index.mdinsidecontent/diary/, for example:+++ title = "Diary" render = true # diary will use blog.html for its template template = "blog.html" +++
Sections can be added to the navigation menu, and optionally configured to display its most recently authored items on your index page. To add your section to the navigation menu:
-
In your
config.tomlunder the[extra]section, add your section to themenu_items:[extra] menu_items = [ ... { name = "diary", url = "$LANG_BASE_URL/diary" } ] -
In your
config.tomlunder the[languages.<code>.translations]section, add your section name translation keys:[languages] [languages.en] [languages.en.translations] diary = "Diary" [languages.zh] [languages.zh.translations] diary = "日记"This will add a simple hyperlink to your new Diary section in the navigation menu.
To also display recently authored items from your Diary section on your index page:
-
Add the following attributes to your menu item:
show_recent: Adds the section's recent items listing to your index page.recent_items: Number of recent items to display.recent_trans_key: Translation key for the recent items listing title text.more_trans_key: Translation key for the hyperlink text to the section.
For example:
[extra] menu_items = [ ... { name = "diary", url = "$LANG_BASE_URL/diary", show_recent = true, recent_items = 3, recent_trans_key = "recent_diary", more_trans_key = "more_diary" } ] -
In your
config.tomlunder the[languages.<code>.translations]section, add your section name,recent_trans_key, andmore_trans_keytranslation keys:[languages] [languages.en] [languages.en.translations] diary = "Diary" recent_diary = "Recent Diaries" more_diary = "More Diaries" [languages.zh] [languages.zh.translations] diary = "日记" recent_diary = "近期日记" more_diary = "更多日记"This will add both a hyperlink to your new Diary section in the navigation menu, and a listing of the three most recent items from your Diary section on your index page.
Configuring URL menu items
If you want to add a simple link to the navigation menu, add an item with a name and url. For example:
[extra]
sections = [
    ...
    { name = "tag", url = "$LANG_BASE_URL/tags" }
]
A translation key for your link's name must be added into your config.toml:
[languages]

[languages.en]

[languages.en.translations]
tag = "Tag"

[languages.zh]

[langauges.zh.translations]
tag = "标签"
If you include $BASE_URL in the URL of a link it will be replaced with the base URL of your site, and $LANG_BASE_URL will be replaced with the language-specific base URL of your site.
Post/project date formats
You can have different date formats in different languages. You need to set the date_format value in every langauge's translation section.
Example:
[languages]

[languages.en]

[languages.en.translations]
date_format = "%e %B %Y"

[languages.zh]

[languages.zh.translations]
date_format = "%Y 年 %m 月 %d 日"
The formatting uses the standard date filter in Tera. The date format options you can use are listed in the chrono crate documentation.
Post/project featured images
Posts and projects can have featured images which display at the top of their page before the page contents.
[extra]
featured_image = "image.jpg"
featured_image_alt = "A lodge overlooks a forested mountain range."

Featured images can also be extended to the full width of the viewport:
[extra]
featured_image = "image.jpg"
featured_image_alt = "A lodge overlooks a forested mountain range."
featured_image_extended = true

Open Graph Protocol locale/profile information
In your config.toml you can add a [extra.ogp] section to specify your Open Graph Protocol locale and profile information.
Open Graph Protocol provides you control over how your website's content should be displayed on social media sites.
For the more information on Open Graph Protocol and valid property values, visit the official website.
Example:
[extra.ogp]
locale = "en_US"
first_name = "Papaya"
last_name = "Tiliqua"
gender = "female"
username = "tiliquasp"
Utterances
Utterances is a comments widget built on GitHub issues. When enabled, Papaya can display GitHub issues as comments on your blog posts.
To enable:
-
Follow instructions on the utterances website.
-
Once you're at the "Enable Utterances" step, enter the following keys into your
config.toml:[extra.utterances] enabled = true repo = "yourname/yourrepository" # put your repository's short path here post_map = "pathname" label = "utterances" theme = "preferred-color-scheme"
Social/contact links
In your config.toml you can add a [extra.social] section to specify your social network/contact accounts. Changing these will update what links appear on your website's footer.
Example:
[extra.social]
email = "papaya@tiliqua.sp"
github = "papaya"
linkedin = "papayatiliqua"
twitter = "papayathehisser"
If you want to include other custom social websites, you can add them to other:
Example:
[extra.social]
other = [
    { name = "BTC", font_awesome = "fa-brands fa-btc", url = "https://www.bitcoin.com/" }
]
The font_awesome attribute specifies the Font Awesome classes; you can find them in Font Awesome. Be aware that different versions of Font Awesome may include different sets of icons; you can change your version of Font Awesome by updating the CDN path in the [extra.cdn] section:
[extra]

[extra.cdn]
font_awesome = "https://cdnjs.cloudflare.com/ajax/libs/font-awesome/6.0.0-beta2/css/all.min.css"
Image embedding shortcode
Included with Papaya is a shortcode for embedding images into your posts:
img(path, alt, caption, class, extended_width_pct, quality)
You can use ./<image-path> to specify the relative path of image which is relative to current markdown file.
Arguments
-
path: The path to the image. It can be either:- a full path (eg:
https://somesite.com/my-image.jpg), - relative to the
contentdirectory in the directory structure (eg:@/projects/project-1/my-image.jpg), or - relative to the current markdown file (eg:
./my-image.jpg).
- a full path (eg:
-
alt: (optional) The alternate text for the image. -
caption: (optional) A caption for the image. Text/HTML/Tera templates supported. -
class: (optional) Any CSS classes to assign to the image. Multiple classes should be separated with a space (" "). -
quality: (optional) JPEG or WebP quality of the image, in percent. Only used when encoding JPEGs or WebPs; default value is90. -
extended_width_pct: (optional) The percentage by which the image's width should be expanded past it's default figure width, up to maximum configured pixel width.Range is
0.0-1.0, or-1for document width.Max pixel width can be defined in your
config.tomlwith theextra.images.max_widthproperty (2500px default).See Extended width images section for more details and examples.
The benefits of using this shortcode over regular Markdown/HTML image embedding are:
- Images are automatically resized for best performance, using Zola's image processing functions
- Images & captions are ✨pre-styled✨ for you
- Images can have their width extended past the document's width (see: Extended width images
- Less HTML/CSS boilerplate to write
Extended width images
Images embedded into pages using the img shortcode can be configured to extend past their document width. This is especially nice for displaying wide/landscape images at higher resolutions.
By default, images embedded with the img shortcode will be inserted as a figure with default margins:
{{ img(path="image.jpg",
       alt="A very cute leopard gecko.",
       caption="A very cute leopard gecko. Default sizing.") }}

With the extended_width_pct argument, we can specify a percentage of how much the image should expand outside its default figure width, up to your maximum configured image width (config.extra.images.max_width, 2500px default).
Here's an example with extended_width_pct=0.1:
{{ img(path="image.jpg",
       alt="A very cute leopard gecko.",
       caption="A very cute leopard gecko. extended_width_pct=0.1",
       extended_width_pct=0.1) }}

The image is now displayed with a 10% larger width, while maintaining its original aspect ratio.
Here's an even wider example:
{{ img(path="image.jpg",
       alt="A very cute leopard gecko.",
       caption="A very cute leopard gecko. extended_width_pct=0.2",
       extended_width_pct=0.2) }}

The images will resize in resolution up to your maximum configured image width, and will display on the webpage up to the maximum width of the viewport.
You can also force the image width to match the document's width by setting extended_width_pct to -1:
{{ img(path="image.jpg",
       alt="A very cute leopard gecko.",
       caption="A very cute leopard gecko. extended_width_pct=-1",
       extended_width_pct=-1) }}

Why "Papaya"?
🦎